Mars Rally Championship, a free browser rally game, models vehicle damage as four independent 0–100 HP pools — chassis, per-corner suspension, motor, battery — instead of a deformable mesh. Each impact turns closing speed into a severity number through an energy curve, subtracts HP, and then feeds straight back into the handling model: less grip, less torque, less usable battery, and a steering pull toward the damaged side. The deformation you see is the cheap half. The half you feel costs almost nothing per frame.
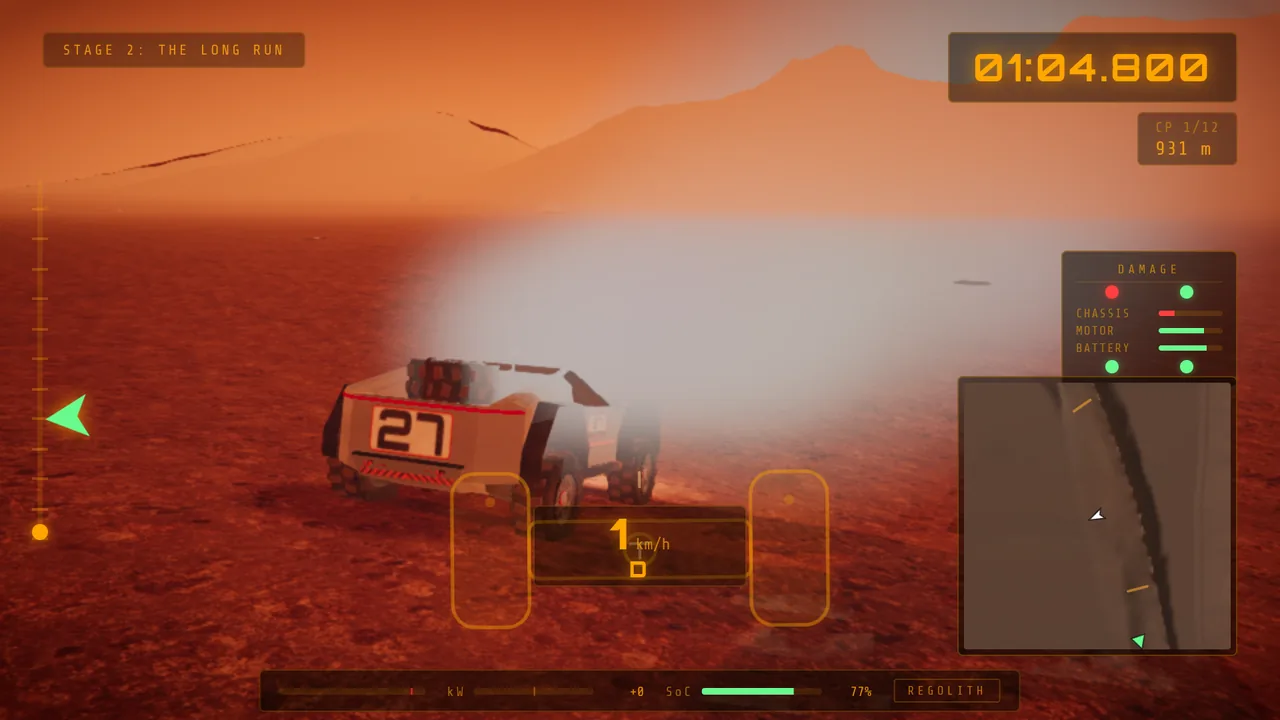
In-game screenshot: the damage panel after repeated hard hits: chassis, motor and battery bars plus the four suspension corners, all on one 0 to 100 scale.
Soft-body deformation is not a browser budget
The reference implementation is BeamNG.drive, which builds each vehicle from a node-beam lattice — hundreds of mass nodes joined by spring-damper beams, solved thousands of times a second, with the visible mesh skinned to the deforming structure. That is the right answer if you have a native binary, several cores, and a player who accepted a 30 GB install.
I have one main thread. It shares a frame with a Three.js scene graph, terrain sampling, particle pools, the HUD, and a physics loop already running eight substeps per 60 Hz tick — 480 Hz — to solve four independent tire contacts. There is no build step and no worker pool; the game is plain ES modules served as-is. A soft-body solver would cost an order of magnitude more integration per frame plus a vertex buffer re-upload every time anything bent.
So I stopped asking how to afford deformation and asked what players notice. Nobody in a playtest ever said the panel gap on that fender was wrong. What they said was that the rover felt fine, then they clipped a mesa at speed, and afterwards it pulled left and would not hold a line. Deformation is a picture of damage; changed handling is damage.
Four HP pools instead of a deformable mesh
The entire persistent damage state is a handful of floats in
public/js/audio.js:
GameConfig.Damage = Object.freeze({
  CHASSIS_HP_MAX:        100,
  SUSPENSION_HP_MAX:     100,   // per corner: susFL, susFR, susRL, susRR
  MOTOR_HP_MAX:          100,
  BATTERY_HP_MAX:        100,
  CHASSIS_HP_PER_HIT:    36,    // cost at severity 1.0
  SUSPENSION_HP_PER_HIT: 50,    // corners take it worse
  MOTOR_HP_PER_HIT:      14,
  BATTERY_HP_PER_HIT:    12,
});
Seven scalars for the mechanical model, four more for per-tire wear, eight for body panels. Keeping every pool on one 0–100 scale means the HUD, the debug overlay, the cup carry-over summary and the repair logic all speak the same unit.
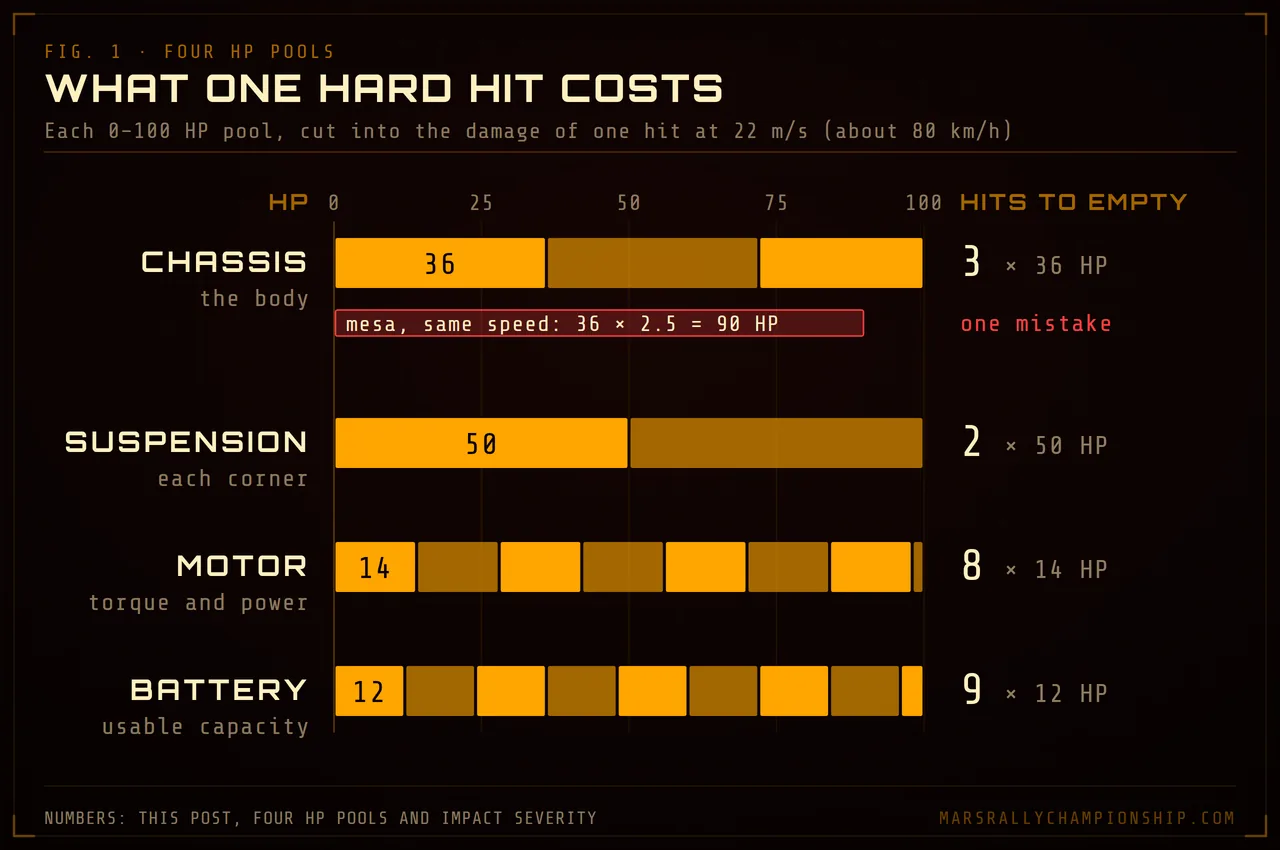
Diagram: at 22 m/s one hit costs 36 chassis HP, 50 per suspension corner, 14 motor and 12 battery; a mesa at that speed takes 90.
Impact severity is energy, not speed
A linear speed-to-damage mapping feels wrong immediately, because players intuit kinetic energy: doubling your speed into a rock should be about four times as bad, not twice. Severity is a normalised energy ratio with a floor and a deliberate overshoot:
const vSq    = impactSpeed * impactSpeed;
const softSq = D.IMPACT_SOFT_MPS * D.IMPACT_SOFT_MPS;   // 3.0 m/s
const hardSq = D.IMPACT_HARD_MPS * D.IMPACT_HARD_MPS;   // 22.0 m/s
const baseSev  = Math.max(0, (vSq - softSq) / Math.max(1, hardSq - softSq));
const severity = Math.min(D.IMPACT_OVERCAP, baseSev);   // 1.8
Three constants carry the feel. IMPACT_SOFT_MPS = 3.0 is the floor: below
3 m/s nothing happens, which kills the contact-jitter case where a rover resting
against a boulder bleeds HP forever. IMPACT_HARD_MPS = 22.0, about 80 km/h, is
the reference speed where severity is exactly 1.0 and the per-hit costs apply as
written. IMPACT_OVERCAP = 1.8 lets catastrophic hits keep scaling past that
instead of clipping, so a 100 km/h nose-in differs from an 80 km/h one.
impactSpeed is the closing speed along the contact normal, not the number on
the speedometer. A glancing scrape at 40 m/s can carry a normal component under
the 3 m/s floor and cost nothing, which is what you want: rally drivers brush
things constantly.
Obstacle class scales the result. Rocks are 1.0, mesas 2.5, and hard landings 0.85 — under a rock because suspension travel absorbs part of the vertical hit before the chassis sees it. A mesa at the reference speed costs 36 × 2.5 = 90 chassis HP. One mistake, one rover.
Finding the collider is cheaper than the response: rocks sit in a 5 m uniform grid, the resolver queries the rover's cell plus its eight neighbours and runs capsule-versus-circle on the XZ plane, and anything under a 0.6 m radius never gets a collider at all.
| Pool | Cost per hit at severity 1.0 | Handling consequence at 0 HP |
|---|---|---|
| Chassis | 36 HP | Total loss: limp mode, torque ×0.20 and grip ×0.50 until repaired |
| Suspension (per corner) | 50 HP | Tire grip ×0.40 across the car |
| Motor | 14 HP | Peak torque and peak power ×0.50 |
| Battery | 12 HP | Usable capacity ×0.70, so you run flat sooner |
Coupling damage to handling is where the budget goes
This is the part worth spending on. Each coupling is one multiplier evaluated where the physics already reads a coefficient, so the marginal cost is a multiply. Suspension is the big one — four corner pools averaged, normalised, and run through a single loss constant:
const suspAvgN = (damageState.susFL + damageState.susFR +
                  damageState.susRL + damageState.susRR) / (4 * maxHp);
const gripDmgFactor = 1 - GameConfig.Damage.GRIP_MAX_LOSS * (1 - suspAvgN);
// GRIP_MAX_LOSS = 0.60 → grip × 0.40 at zero
That factor multiplies the per-wheel friction coefficient and the lateral grip term. The Mars grip budget is already thin — 3.72 m/s² of gravity against a base friction coefficient of 0.70, plus a little regolith cohesion, leaves roughly 3.1 m/s² to split between braking, cornering and throttle, which is why stopping from 100 km/h takes about 125 metres. Taking 60% of that away does not make the rover twitchy, it makes it a barge, and every braking point you memorised on Stage 3, The Opener stops working.
Motor and battery follow the same shape. A damaged motor derates peak torque and peak power together by up to half, chained multiplicatively with the existing low-state-of-charge fade. A damaged battery shrinks effective capacity to 0.70 at zero HP while the gauge stays referenced to nominal capacity — the needle does not jump when you take a hit, you just find the bottom of the pack early.
Tires wear on their own clock
Per-tire HP is tracked separately from suspension, four more floats, because a
blown tire and a bent corner are different failures. A direct impact routes 18 HP
to the nearest corner. Lateral slip wears them too, but slowly:
TIRE_WEAR_SLIP_COEFF = 0.05 HP per radian-slip-second works out to about 0.08 HP
per second per tire even fully sideways, under 5 HP a minute. Rocks, not drifts,
are what wear tires out.
Grip from tire condition is piecewise-linear with a deliberate cliff at 20%:
const tireN = Math.max(0, S.carState.tireHP[i]) / D.TIRE_HP_MAX;
const tireMul = (tireN < D.TIRE_BLOWOUT_THRESH)   // 0.20
  ? (0.20 + tireN)              // blowout regime — steep collapse
  : (0.25 + 0.75 * tireN);      // normal wear — 1.0 at full, 0.40 at threshold
Above the threshold, wear is a tax you drive around. Below it the corner falls off a cliff and the tire mesh visibly squishes, and at that slip rate you only get there by hitting things. A long, showy drift costs you speed rather than rubber, which is the real reason fast rally driving is mostly about not oversliding.
The steering pull is the cheapest trick in the system
If I could keep only one line of the coupling code, it would be this one. Damage is compared left to right, weighted, clamped, and added to the steering target before smoothing:
const tireFrontAsym = (tireHP[FR] - tireHP[FL]) / TIRE_HP_MAX;
const raw = tireBias * 0.7 + susBias * 0.3;      // front axle weighted 2× rear
return clamp(raw * D.MAX_STEER_BIAS, -cap, cap); // 0.08 rad ≈ 4.5°
Front damage counts twice as much as rear, and tire damage counts more than suspension damage, because rolling resistance on a flat tire is the physical source of the yaw. Maximum authority is 0.08 rad, about 4.5 degrees; any more and the rover is undriveable rather than damaged.
Four and a half degrees sounds like nothing, and it is the most effective thing in the whole system, because it is the only consequence the player feels without looking at anything. Every other one has to be inferred. The pull is continuous and it is in your hands. Spend your first hour of damage work here, not on dents.
Repair zones, and why the cup turns damage into strategy
Damage that only accumulates is a slow death sentence, so there is a repair zone: an 8 m radius around the stage's start position. The rover must be stopped, under 2 m/s, and then every pool heals at 20 HP per second — five seconds from dead to full. Tires are meaner: they start recovering only after a 3-second dwell, then heal at half the rate.
At zero chassis HP the rover enters a total-loss state instead of ending the run. Torque drops to 20%, grip to 50%, and a TOTAL LOSS banner offers two ways out: restart the stage, or limp back to the repair zone, with the distance to it on the banner and the zone marked on the minimap. The limp lifts only once the chassis is back above 60 HP — hysteresis, so you cannot flicker across the boundary.
In a single stage that is a safety net. In the Mars Cup it becomes the decision, because mechanical damage carries between stages; only the battery resets, treated as a solar recharge. Seconds parked in the repair zone now compete with the cumulative clock, and a clean run stops being a matter of taste.
Keeping it deterministic so replays stay bit-exact
Every run records its inputs, and a replay re-simulates them — so does the server, before any time goes on the leaderboard. That gives bit-exact replays and puts a hard constraint on the damage model: no unseeded randomness may touch a value the simulation reads back.
The damage math obeys that by construction. Severity is a pure function of impact speed and obstacle type, every subtraction is deterministic, and nothing samples Math.random in the HP path, the coupling factors, or the steering bias.
The cosmetic layer does use randomness — spark cone directions, smoke jitter, the
flicker interval on a broken brake light — and that is fine, because it writes to
particle pools and materials, never to carState. Where a replay needs the same
shower of sparks in the same place, the collision resolver logs a small event
instead of trusting the RNG: frame index, world contact point rounded to
centimetres, ejection normal to three decimals, severity quantised to a percent.
The rule worth stealing is that randomness lives strictly downstream of the
simulation, never inside it.
The visual layer is deliberately the cheap half
Body damage is eight regions — front, mid and rear × left, centre and right — keyed off the contact point in car-local space. Each carries its own 0–100 HP at 1.4× the chassis cost, so visible damage leads the mechanical state, and each drives threshold transitions rather than simulation: below 60% a mirror misaligns, below 40% the side glass swaps to a cracked material, below 25% the part leaves the car group and is gone. Chassis HP drives the rest — windshield cracking at 40, antennas at 25, a heavier spider crack at 15, smoke under 50, engine fire under 15.
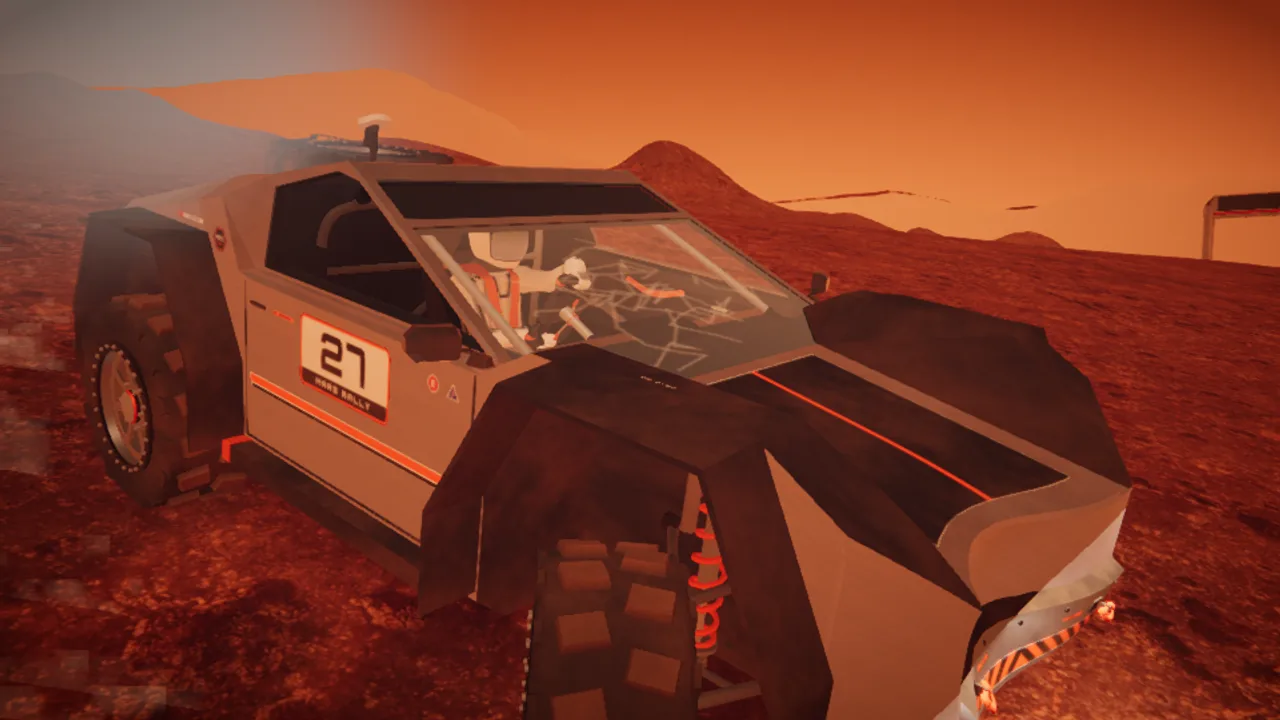
In-game screenshot: after repeated hits the nose panel has come away and the windscreen has cracked. The cosmetic damage changes on impact, and the repair zone undoes it.
Dents are one pass over the chassis geometry's position attribute: vertices inside
a severity-scaled radius are pushed along the inward contact normal with a squared
falloff, depth capped at 0.18 m so a catastrophic hit cannot punch through the
body, then one computeVertexNormals(). It runs on impact, not per frame, and the
crack texture is drawn once onto a 256-pixel canvas shared by every glass mesh.
Every mutation snapshots the mesh's original transform and material the first time it is touched, so the repair zone reverses the cosmetic state exactly. Per-frame cost of the whole visual layer: a handful of threshold comparisons. That is the right budget for the half players notice second.
Where to try this
Take a rover somewhere it will get hurt and watch what changes:
- Start driving — bare
/playputs you straight on a stage. - Stage 3, The Opener has boulders just off its line and a repair zone at the start, which makes the damage-and-recover loop easy to see.
- The Mars Cup is where damage turns strategic.
- Ghost racing shows the determinism this model has to respect; the write-up on deterministic replays explains how it holds.